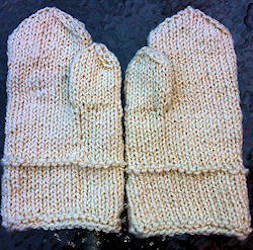
This is a knitting pattern for making handfelted wool mittens using handspun yarn.
I used handspun merino wool and felted the mittens after knitting. I also added a trim to the cuff of the mittens using Sami-style woven braid. You could also embroider a design into the edge.
I have a fairly small hand – so this pattern will need to be adjusted for larger sizes to fit your hand. Since the mittens will be felted, allow for about 10-15% shrinkage.
Mitten Knitting Pattern
Cast on 35 stitches.
Knit 2 rows in the round.
Purl one row.
Knit 12 rows – or about 2.5 inches in length.
The handwoven trim (or embroidery) will be added into this cuff section of the mitten.
Knit 14 rows or about 3 inches.
You can measure the length of this section to your hand – it should be from the bottom of your wrist to the start of your thumb.
Place 7 stitches onto a stitch holder. This will be for the thumb.
Continue knitting in the round on the remaining stitches (28 stitches), until the mitten reaches the top of your fingers. (18 rows)
Decrease 4 times per row as follows:
Slip stitch, knit 1, psso. Knit 10, knit 2 together, slip stitch, knit 1 psso, knit 12, knit 2 together.
SS, K1, psso, K8, K2 tog, ss, K1, psso, K8, k2 tog.
SS, K1, psso, K6, K2 tog, ss, K1, psso, K6, k2 tog.
SS, K1, psso, K4, K2 tog, ss, K1, psso, K4, k2 tog.
SS, K1, psso, K2, K2 tog, ss, K1, psso, K2, k2 tog.
SS, K1, psso, K2 tog, ss, K1, psso, k2 tog.
Sew remaining stitches together.
To knit the Thumb:
Using double pointed needles pick up the 7 stitches from the stitch holder.
Pick up an additional9 stitches to form the base of the thumb (16 stitches)
Knit in the round until the thumb measures the length of your thumb. (9 rows)
Decrease on the thumb:
In a similar fashion to the decreases at the top of the mitt, decrease 4 stitches per row.
SS, K1, psso, K6, K2 tog, ss, K1, psso, K6, k2 tog.
SS, K1, psso, K4, K2 tog, ss, K1, psso, K4, k2 tog.
SS, K1, psso, K2, K2 tog, ss, K1, psso, K2, k2 tog.
SS, K1, psso, K2 tog, ss, K1, psso, k2 tog.
Sew remaining stitches together.
Sew in all yarn ends on the reverse side of the mittens.
How to Felt the Mittens
I use a large bucket of hot water and a spray bottle filled with cold water and dish detergent.
Soak the mittens in the hot water and place them onto a bamboo felting matt.
If you don’t have one, you can use a large sheet of bubble wrap instead.
Spray the mittens with the cold soapy water and rub the outside of the mittens vigoursly to produce suds.
Turn the mittens over and spray the other side of the mittens as well.
Roll the mittens up in the bamboo matt and roll it back and forth on a table.
Unroll the felting matt and turn the mittens around, spray more soapy water.
Reroll the matt and keep rolling.
Unroll the matt again and dip the mittens in the hot water.
Spray more soapy water, rub the mittens and roll some more.
This felting process will take some time, so keep repeating the dipping in hot water, add more soap and roll again.
The mittens will look like they are stretching first, so don’t be alarmed. They will eventually shrink and begin to felt.
Sami Weaving Patterns
Sami Weaving Drafts
Sami Beaivi Weaving Loom Video
AMAZON Mitten Knitting Books
Knitting Hats & Mittens from Around the World: 34 Heirloom Patterns in a Variety of Styles and Techniques
Folk Mittens (Folk Knitting series)
Mostly Mittens: Ethnic Knitting Designs from Russia
Heart Felt Knits: 25 Fresh and Modern Felting Projects
EBAY Handspun Art Yarns
HANDSPUN ART YARN – US
HANDSPUN ART YARN – UK
 LONGTHREAD MEDIA VIDEO
 LONGTHREAD MEDIA SUBSCRIPTIONS
HANDWOVEN MAGAZINE
PIECEWORK MAGAZINE
SPINOFF MAGAZINE
LEARN LONGTHREAD MEDIA
PAIVATAR HANDMADE
 Paivatar on YouTube
Visit my YouTube channel for how-to craft videos.
Or Please visit my Channel on Rumble for more how-to videos.
https://rumble.com/Paivatar
LIVE STREAMS - Paivatar Studio
KICK
TWITCH MAKERS&CRAFTING
YOUTUBE
Categories: FELTMAKING, Handspun Yarns, KNITTING, Knitting Patterns


